
Menu Design & Photography: Psychology That Lifts Average Spend
The average spend per cover at a restaurant is not fixed by what’s on the menu — it’s shaped by how the menu presents it. This has been established in hospitality research for decades: the sequence of items, the photography, the language and the design all measurably shift what people order. For Brisbane restaurants, the practical implications are concentrated in one area: professional food photography. The image is the menu’s primary persuasion tool online, in print and in the Google Knowledge Panel, and most restaurants underinvest in it relative to every other marketing line they fund. This guide covers the psychology, the shot list and the decisions that turn a menu photo session into a genuine revenue driver.
What’s in this guide
- The psychology of menu imagery
- The five shots per dish
- Light: the variable that decides everything
- Styling: the difference between “yummy” and “crave-worthy”
- Where the photos live: each surface has different needs
- Planning a menu shoot session
- Frequently asked questions
The psychology of menu imagery
Hospitality research consistently shows that items with high-quality images are ordered more often than identical items without them — even when the text description is unchanged. The mechanism is dual: the image reduces the uncertainty of ordering something unfamiliar (you know what you’re getting), and it activates appetite directly through visual association with flavour and texture. Both effects are strongest for premium items — the things you most want customers to order. Photographing only the middle of the menu and leaving the high-margin items to description alone is leaving the persuasion work undone where it matters most.
The five shots per dish
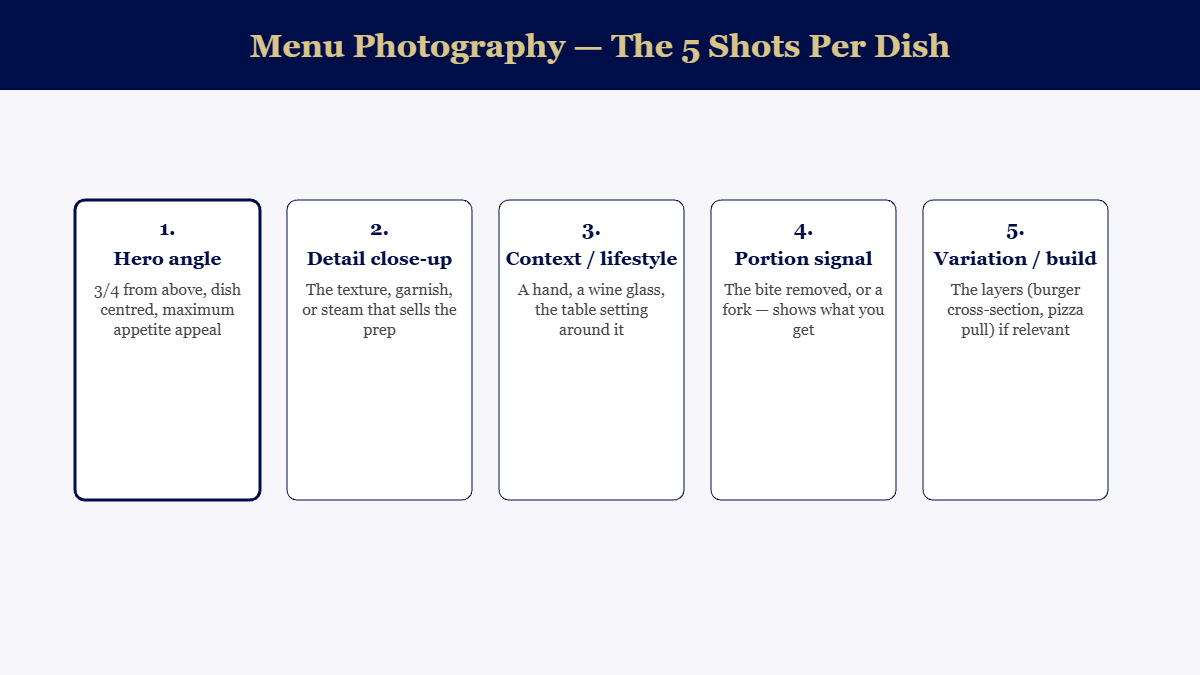
Not every dish needs all five in a standard session — the hero plus one or two contextual shots covers most menu applications. The detail close-up and the portion signal are most valuable for dishes where customers might worry about value or presentation — the expensive steak, the shared platter. The lifestyle context shot is most valuable for campaign use: it places the dish in the dining experience rather than presenting it as an isolated object.
Light: the variable that decides everything
Food photography lives or dies on light quality. The goal is large, soft light from one consistent direction — window light on an overcast day is genuinely the best available source, which is why professional food photographers often prefer venues with north-facing windows in Brisbane (consistent soft light throughout a morning session). Overhead restaurant lighting — the warm downlights most venues use — is flattering to diners but creates the wrong light shape for photography: top-heavy, with none of the side-lighting that reveals texture. A session using a portable softbox positioned correctly replicates the window-light quality regardless of the venue’s lighting rig. This is technical knowledge the kitchen team usually doesn’t have and a food photographer brings as standard. Our restaurant photography sessions are structured around this.
Styling: the difference between “yummy” and “crave-worthy”
Food styling is the discipline of making food look as good in a photograph as it looks when it’s cooked perfectly and plated with intention. The basic principle: everything on the plate should be deliberate. The sauce is swiped, not poured and left. The herbs are fresh from the fridge, placed one at a time. The protein is turned to show the best face. The portions look generous from the camera angle. None of this misrepresents the dish — it represents it at its best, which is how it would be presented for an important table on a Saturday night. A food stylist brings the systematic eye for this that a cook doing their fifth dish in a session doesn’t have the headspace for.
Where the photos live: each surface has different needs
The menu print: clean, consistent, white or neutral background, dish centred. The website: horizontal hero images, room for text overlays. Instagram feed: square or 4:5 portrait crop, strong vertical composition. Google Business Profile: landscape 4:3, recognisable at thumbnail size. Paid ads: vertical 9:16 for stories, horizontal 16:9 for YouTube pre-roll. A well-briefed session captures crops for all of these simultaneously — the photographer knows to frame the dish with headroom for the website text overlay and tighter for the print. Asking for these specifications at the briefing stage is the difference between a session that produces one usable format and one that covers every surface the dish will appear on.
Planning a menu shoot session
Structure by dish complexity, not dish order. Start with the cold and delicate items (desserts, salads, raw preparations) while the team is fresh and the styling materials are at their best; move to the hot and hardy items (grills, roasts) later when recovery speed matters less. Dish count per day: ten to fifteen items is achievable with a focused team; above twenty, quality tends to drop in the final sessions. For large menus, split across two half-day sessions, or photograph the hero items first and complete the secondary items in a follow-up. The cost-per-dish is lower in a longer session, but diminishing returns on quality are real. Pair the photography session with our food video brief for the highest output-per-day: the setup, styling and crew overlap significantly. Book a free consultation or call 07 2142 4335.
← Explore all our Brisbane marketing guides
Frequently asked questions
How much does menu photography cost in Australia?
A focused menu shoot — ten to fifteen dishes, styled and shot in one session — is typically quoted per brief, with price varying by dish count, number of set-ups, location (studio vs venue) and whether a food stylist is included. The per-dish cost drops significantly as dish count increases, which is why batching a full menu in one day is more economical than booking individual shoots for new items.
What backgrounds work best for food photography?
Neutral textures — timber, slate, marble, linen — that complement the dish without competing with it. Bright white works for clean modern brands; aged wood and darker surfaces work for premium and comfort food. The rule: the background should enhance the food’s colour story, not distract from it. Test one or two options before the full shoot day.
Do restaurants need a food stylist?
For hero images and campaign creative, yes — a stylist ensures the dish looks its absolute best and doesn’t collapse or lose colour under lights during the session. For secondary content and daily social posts, your own kitchen team presenting the dish well is usually sufficient. The ROI on a stylist is highest for the images that will run in paid advertising.
How often should a restaurant update its food photography?
Menu photography should reflect the current menu — images of dishes you no longer serve erode trust and confuse customers who arrive expecting what they saw online. A twice-yearly session covers menu refreshes and seasonal changes. If the menu changes more frequently, photograph new dishes at launch rather than waiting.